

How to Create TLS certificate for Active Directory secure LDAP connection.
When query Active Directory for details like user , Groups, E-mails ect . you need to open on the firewall port 389 and 636 for LDAPS . If you have Certificate Authority on your Active directory just use it to create a certificate for server authentication. The idea is to put in in personal container and after restart the domain services the AD will pick it and use it automatically as long the certificate have the full FQDN on the server as common name. Just type :
certlm.msc
This will open the certificate management . under personal install the certificate with the FQDN (full name of the server) and restart the domain services service. To Create self-sign certificate :
- Logon to the Domain Controller
- Open PowerShell in elevated mode (Right-click on PowerShell, choose Run as Administrator)
- Next Run the New-SelfSignedCetificate cmdlet. NOTE: Replace the DnsName to your server’s FQDN name and NetBIOS name.
New-SelfSignedCertificate -DnsName SanFran-DC01.company.com, sanfran-dc01 -CertStoreLocation cert:\LocalMachine\My
- This cmdlet will create a self-signed cert with given DNSName and place it at Local Computer certificate store.
- Last step: Open Certificate console by click Start button & type Manage Computer Certificates and open it from the search results.
- Find the newly generated Self-Signed SSL Certificate in Personal >> Certificates.
- Select the Self-Signed Certificate and drag & drop to Trusted Root Certificates >> Certificates to trust the certificate on the domain controller.
- Close the Certificate console
Now you are ready to do LDAPs to this domain controller. If you want to validate it works, you can use LDP.exe tool.
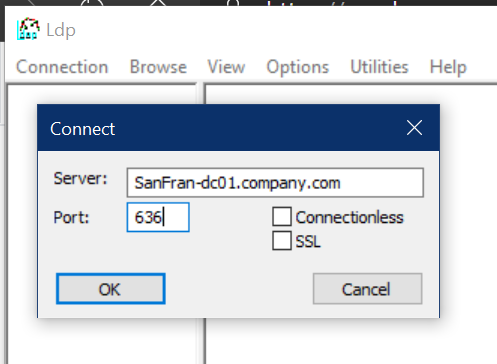
- Open LDP.exe on the domain controller (or any other computer on the network)
- Click Connection menu and choose Connect…
- Type the domain controller FDQN and Port number as 636 and click OK. You should see “Established connection to <domain controller>” and the Base DN details.
Good Luck