

HOW TO CREATE MASQUERADING IP OVER SITE TO SITE VPN TUNNEL OVER COME IP LAPPING ON FORTIGATE FIREWALL
I can across a problem when trying to create Site to Site VPN from main firewall to secondary office, yet the remote address was already in use on another tunnel with static route to that tunnel causing over lapping IP subnet . Policy route will no help here and create another static route on a different tunnel interface will cause balancing and traffic halts.
The “simply” solution in to create VDOM on the main firewall eliminate the over lapping subnet.
There is another option and that is to masquerade the remote ip so on the main firewall the static route to the tunnel will be to a subnet of your choice ! and that will solve the problem of subnets over lapping on site to site VPN tunnels.
In this example the remote ip : 192.168.6.0/24 is in use on another tunnel as remote site,
I will use the subnet : 192.168.7.0/24 as free subnet to use in the tunnel as a remote address.
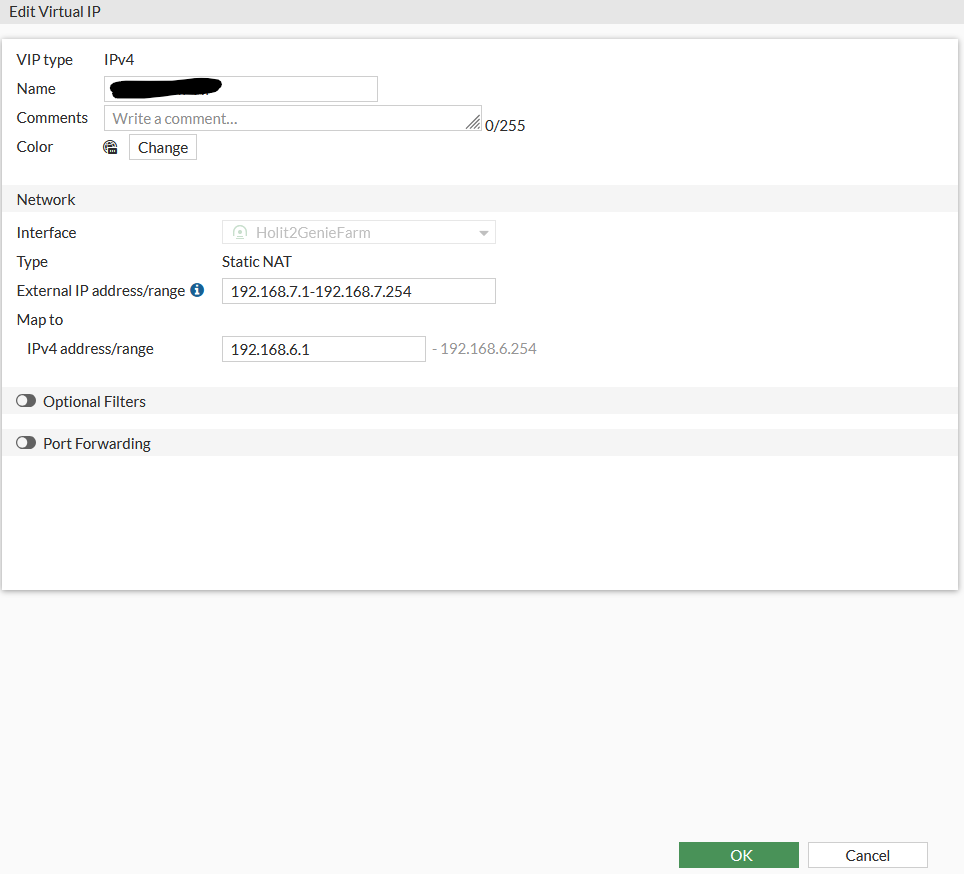
step 1: create VIP on the remote firewall translate 192.168.7.0/24 to 192.168.6.0/24
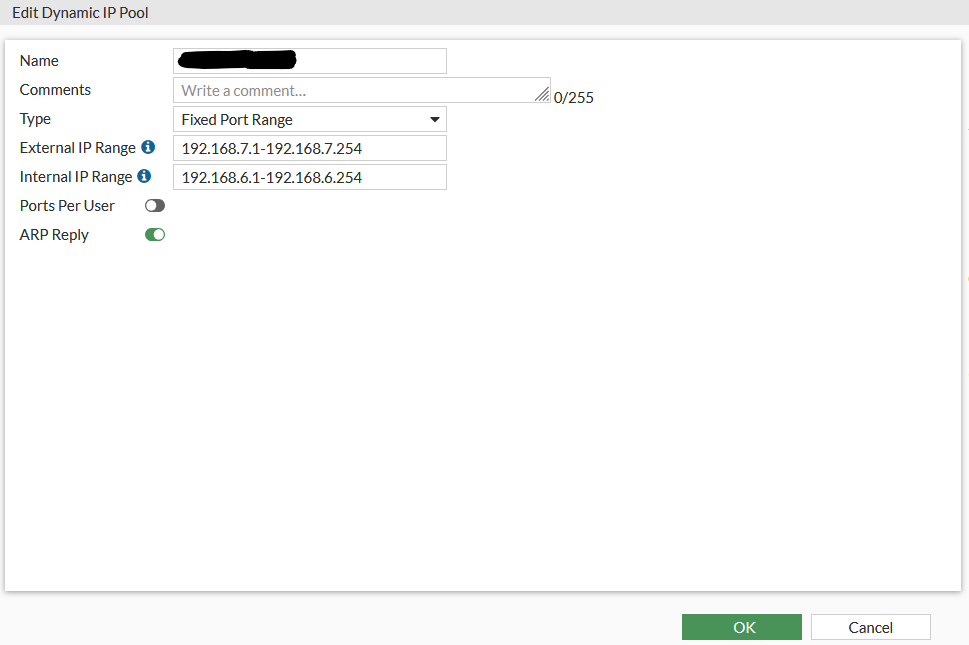
Step 2 : Create Dynamic IP POOL the will NAT the traffic back from the remote to the main .
Step 3 : create a Firewall income rule on the remote site that will translate our selected free IP to the local (remote site) IP :
incoming interface = Site to Site VPN interface
outgoing interface = Local LAN interface
Source IP = could be all yet you can segment to your IP
Destination = the VIP we created to translate from your free IP subnet to the local IP

NAT = no
all the other setting is your choices
Step 4 : Create a Firewall rule outgoing rule on the remote firewall for NAT the return local IP address to your free ip address
incoming interface = Local LAN interface
outgoing interface = Site to Site VPN interface
Source IP = The local IP of the remote site 192.168.6.0/24
Destination = Start will "all" then harden to the remote IP 192.168.7.0/24

enable NAT > IP POOL CONFIGURATION > USE DYNAMIC IP POOL = choose the Dynamic IP pool we have created .
On the main Firewall
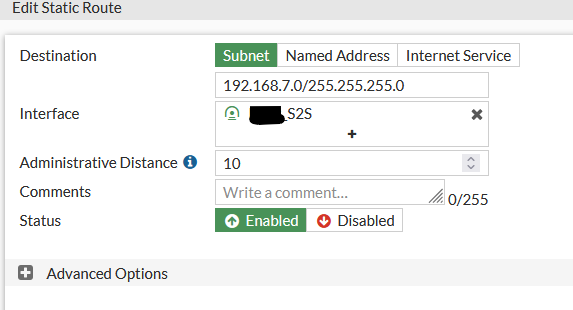
Step 1 : create Static route for the IP 192.168.7.0/24 with the Site to Site interface .
Step 2 : create simple firewall rules that will allow traffic between the sites as usual without any NAT or VIP as the IP Masquerading happens on the remote firewall .
Thast its ! Now to reach from the main firewall to remote IP:
For Example to reach server IP 192.168.6.11 > use 192.168.7.11
to ping server ip 192.168.6.50 > ping 192.168.7.50
on the remote site you can use the main firewall IP subnet as usual !!! no need to translate here .
If you have a situation that on the main firewall there is a overlapping IP as well you will need to create exactly the same object and rules towards the site to site tunnel .
Good Luck