

How To restore Files From Nimble Storage Snapshot in Hyper-v Virtual Machine Cluster
The problem when restoring files from snapshot in hyper-v cluster is to mount the disk presented by the storage on one of the node in the cluster, as the represented LUN/disk have the same signature as the original LUN/disk there for the cluster will not let the disk to be mounted . After hours of playing around withe the system with HP support guys. this is procedure that works :
Start with installing the Nimble connection manager (NimbleNWT) – you can download it from here :
Install the software while register the storage in the process.
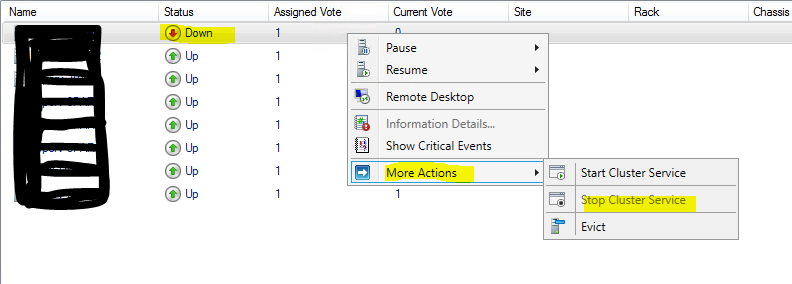
Next , Drain the node that you have installed the NWT from any roles like Virtual machines so the working VM`s or production environment will not be compromise. Stop the cluster service on this node:
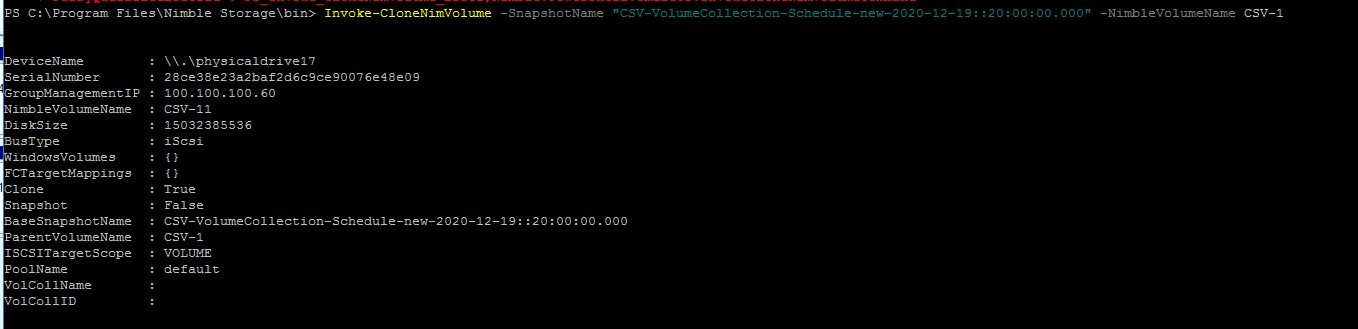
Then Issue this command from Nimble Powershell cmdlets , explained in details here :
Invoke-CloneNimVolume -SnapshotName "SQLVOLCOLTYPE1-daily-2016-02-11::12:38:51.928" -NimbleVolumeName SQLVOLTYPE1.1
NOTE : in some cases I have seen the LUNs getting mounted without any farther steps. (not in this tutorial), You should just try issue this command without doing any thing first, even before you have stop the cluster server !
Now Open the Disk manager and look at the new added disk, it will be added as “Reserved” (manage by cluster disk) :

Now the Trick is to create new virtual machine on the local disk, it can be without any disks, only DVD drive and attach the snapshot disk disk as Raw Disk Map :
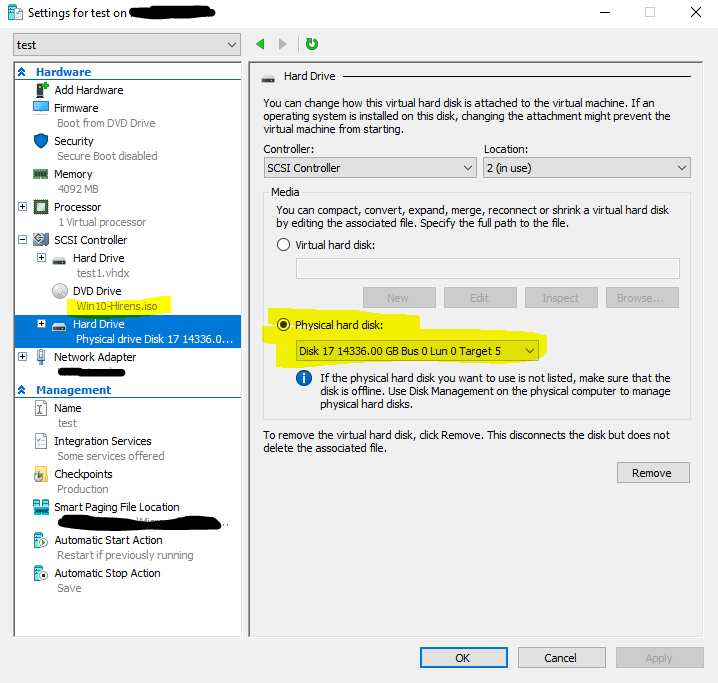
You can boot the VM with Hirens boot disk or any other rescue/tech disks , And now you will have readable disk from the snapshot :
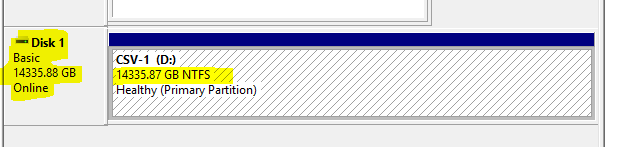
Now you can access the files inside and extract what ever you want !!!